
Week 4 - the Big Jam Quilt Along
A row‑by‑row quilt‑along that’s absolutely jam‑packed with joy
🍓 Week 4: Joining Your Rows & Finishing Your Quilt Top
Sunday 22nd March
We’ve reached our final week of the Big Jam Quilt Along, and this is where everything comes together - literally. With your fruity rows sewn, it’s time to join them into a full quilt top.
This stage always feels a little magical. All those small, careful steps from the last three weeks suddenly become something big, soft, and full of personality.
🍑 Pressing & Nesting: Why Last Week Matters
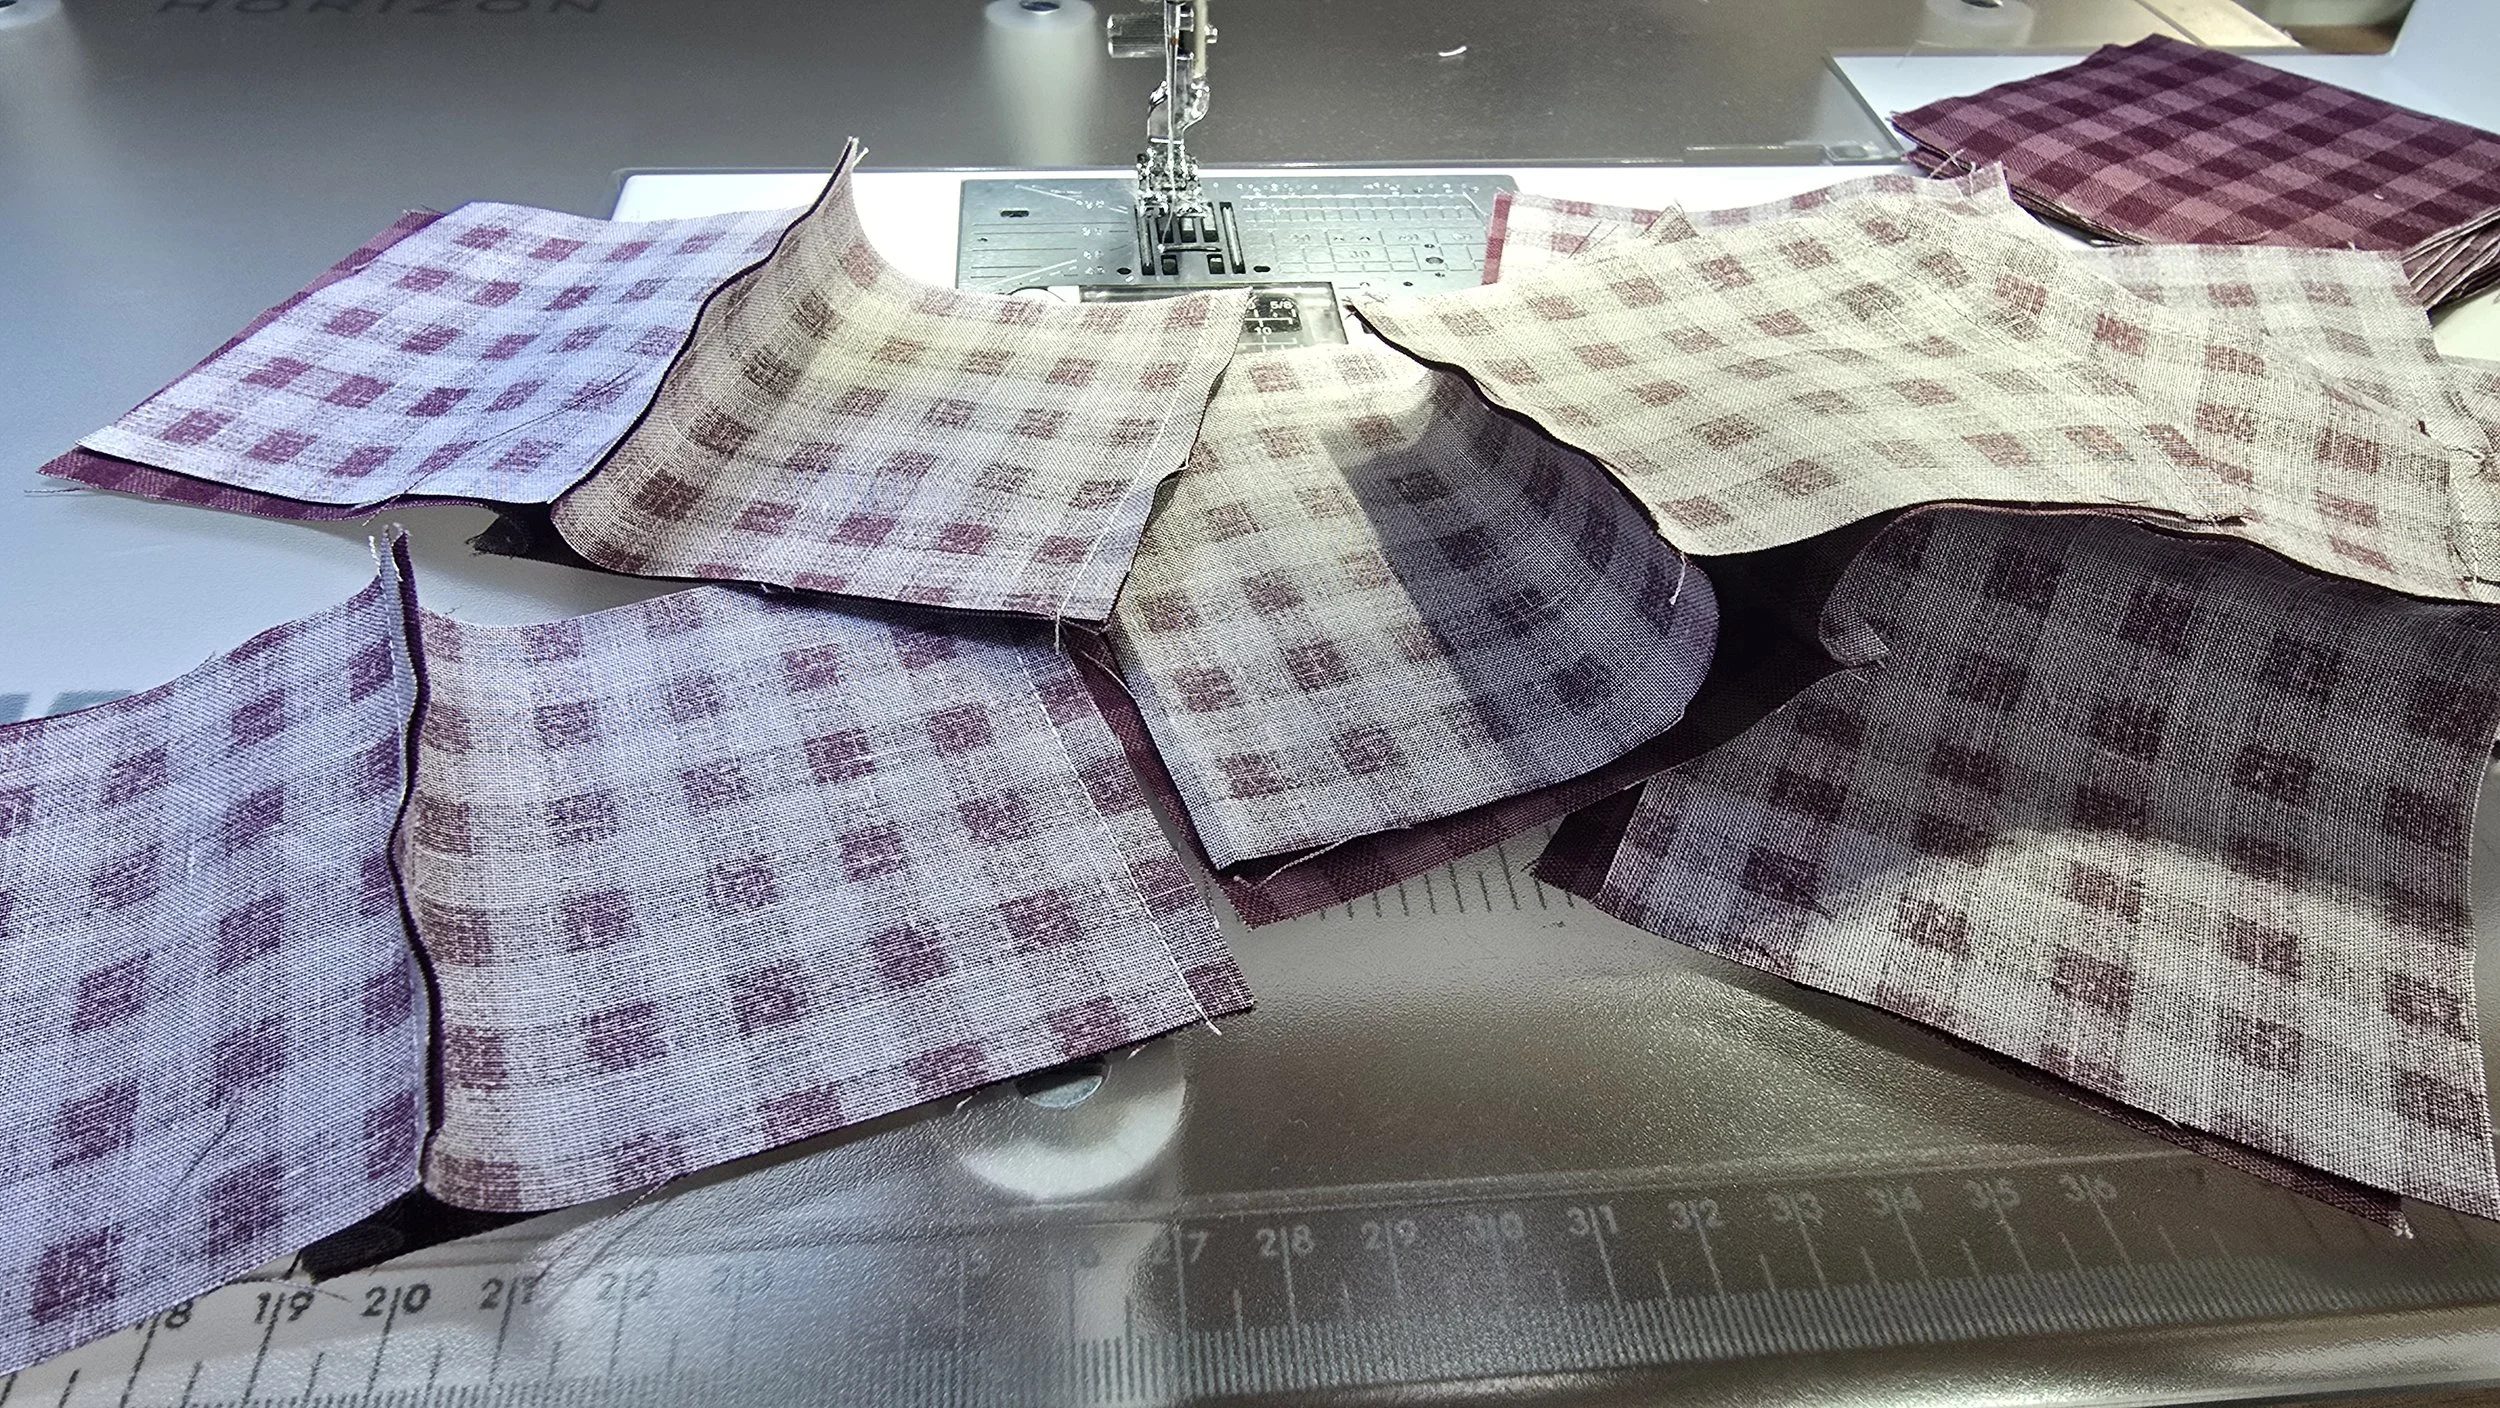
Last week we talked about pressing your seams. This week, that attention pays off.
When your seams are pressed in opposite directions, they “nest” together beautifully. Nesting helps your rows line up with ease, reduces bulk, and gives you those crisp little intersections that make the quilt feel tidy without ever demanding perfection.
A few reminders as you join your rows:
• Feel for the seams with your fingertips, they’ll naturally lock into place.
• Pin or don’t pin, choose whichever keeps your sewing calm and steady. I am not a fan of pinning, but I know some of you are.
• Press each long seam as you go so the quilt stays manageable.
This is slow, satisfying work. Let it unfold at your own pace.
🍋 How I Join Large Quilt Tops Without the Weight
The Big Jam Quilt is a generous size, and sewing long rows together can feel heavy on your hands and shoulders. To keep things comfortable, I always break the quilt into smaller sections before joining everything into the full top.
Here’s the method I use:
1. Divide the quilt into two or three manageable sections
For example: top third, middle third, bottom third.
2. Sew the rows together within each section
This keeps the weight nice and light
3. Press each section carefully
Keep those seams nesting and the fabric smooth.
4. Join the sections together
You’ll only handle the full quilt top for a short time at the end.
This approach keeps the bulk off your machine, protects your shoulders, and makes the whole process feel much more accessible, especially if you’re sewing in shorter bursts.
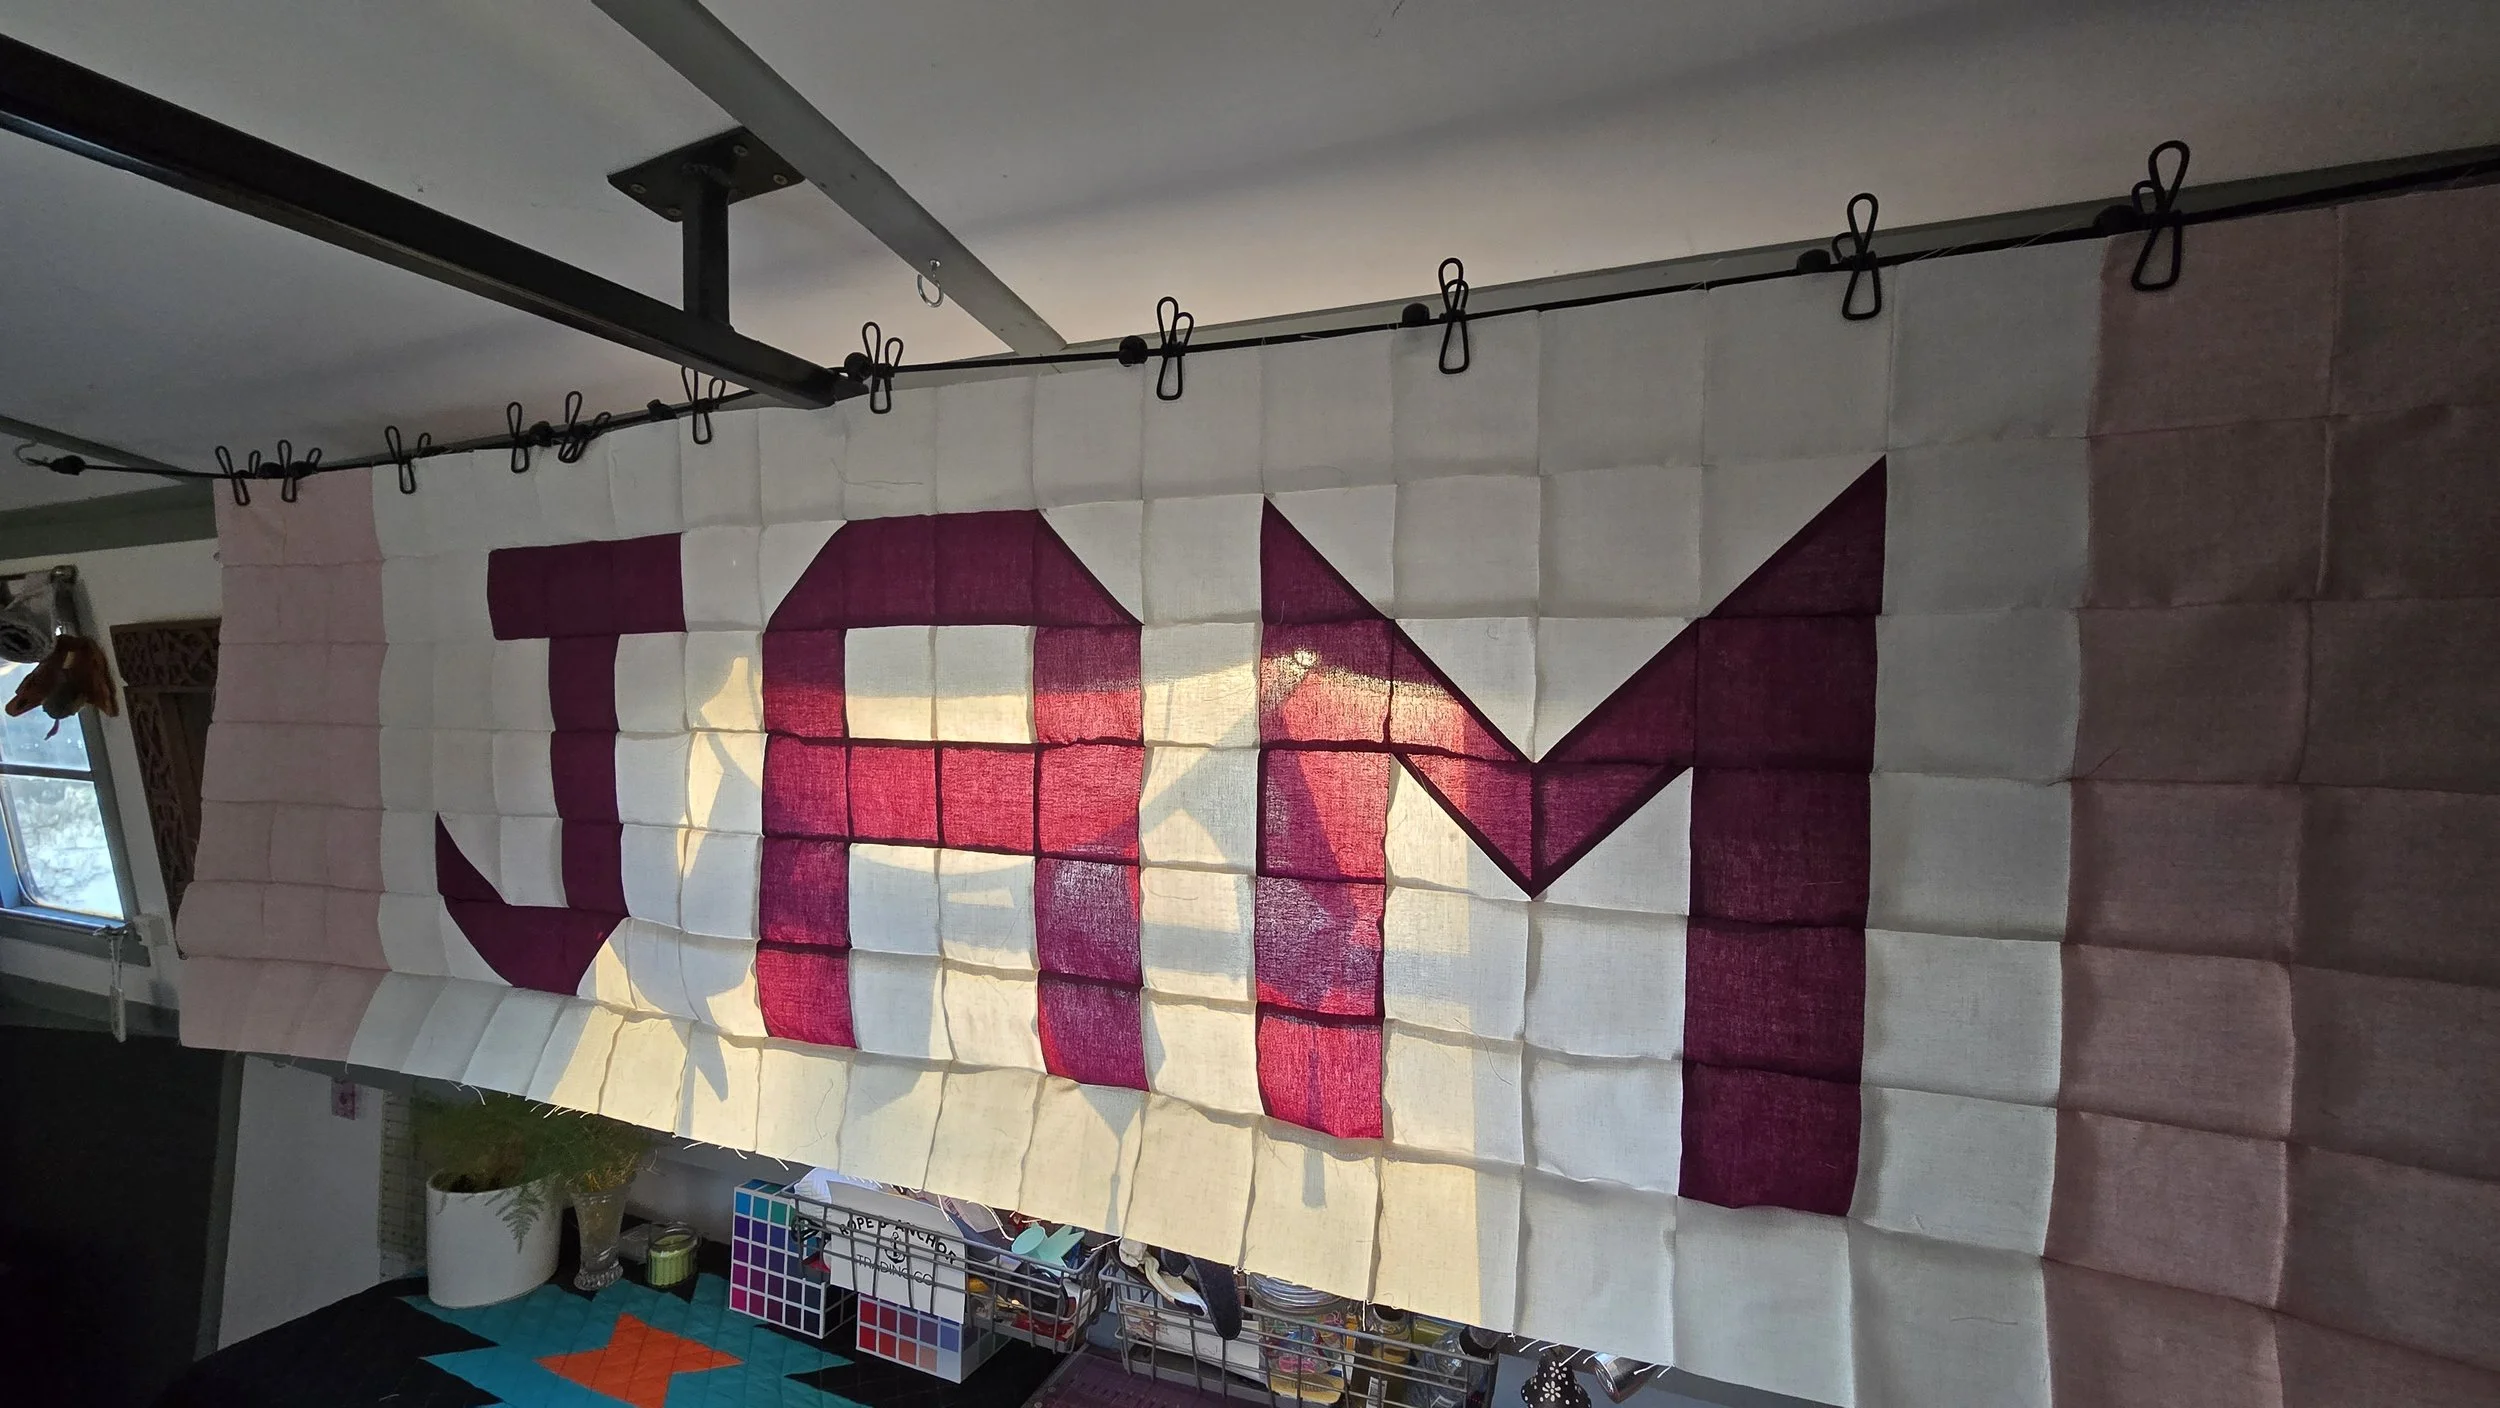
Break your quilt top down into more manageable sewing.
🍒 Parade of Quilts: Show Me Your Jam Jars
One of my favourite parts of any quilt along is seeing how your quilts turn out. Every colour choice, every fruit combination, every tiny variation makes these quilts uniquely yours.
I’d love to create a Parade of Quilts to celebrate everyone’s finishes.
If you’d like to be included:
• Send me a photo of your finished quilt top or completed quilt
• Any lighting, any backdrop, just as it is
• I’ll gather them together and share a gentle round‑up
It’s such a lovely way to close the quilt along and honour the time, care, and creativity you’ve poured into your Big Jam Quilt.
🍓 Thank You for Sewing With Me
Thank you for taking part in this quilt along, whether you sewed week by week, dipped in and out, or quietly stitched along in your own time. It’s been great to share this pattern with you and to see your fruit rows come to life.
I can’t wait to see your finished Jam Jars
Watch the video below
Made on the Cut, quilting and sewing group | Facebook
Get the Pattern
The full Jam Quilt pattern is now available to download from my website.
It includes:
Step‑by‑step instructions
Diagrams
Cutting charts
Colouring sheet
Fabric requirements
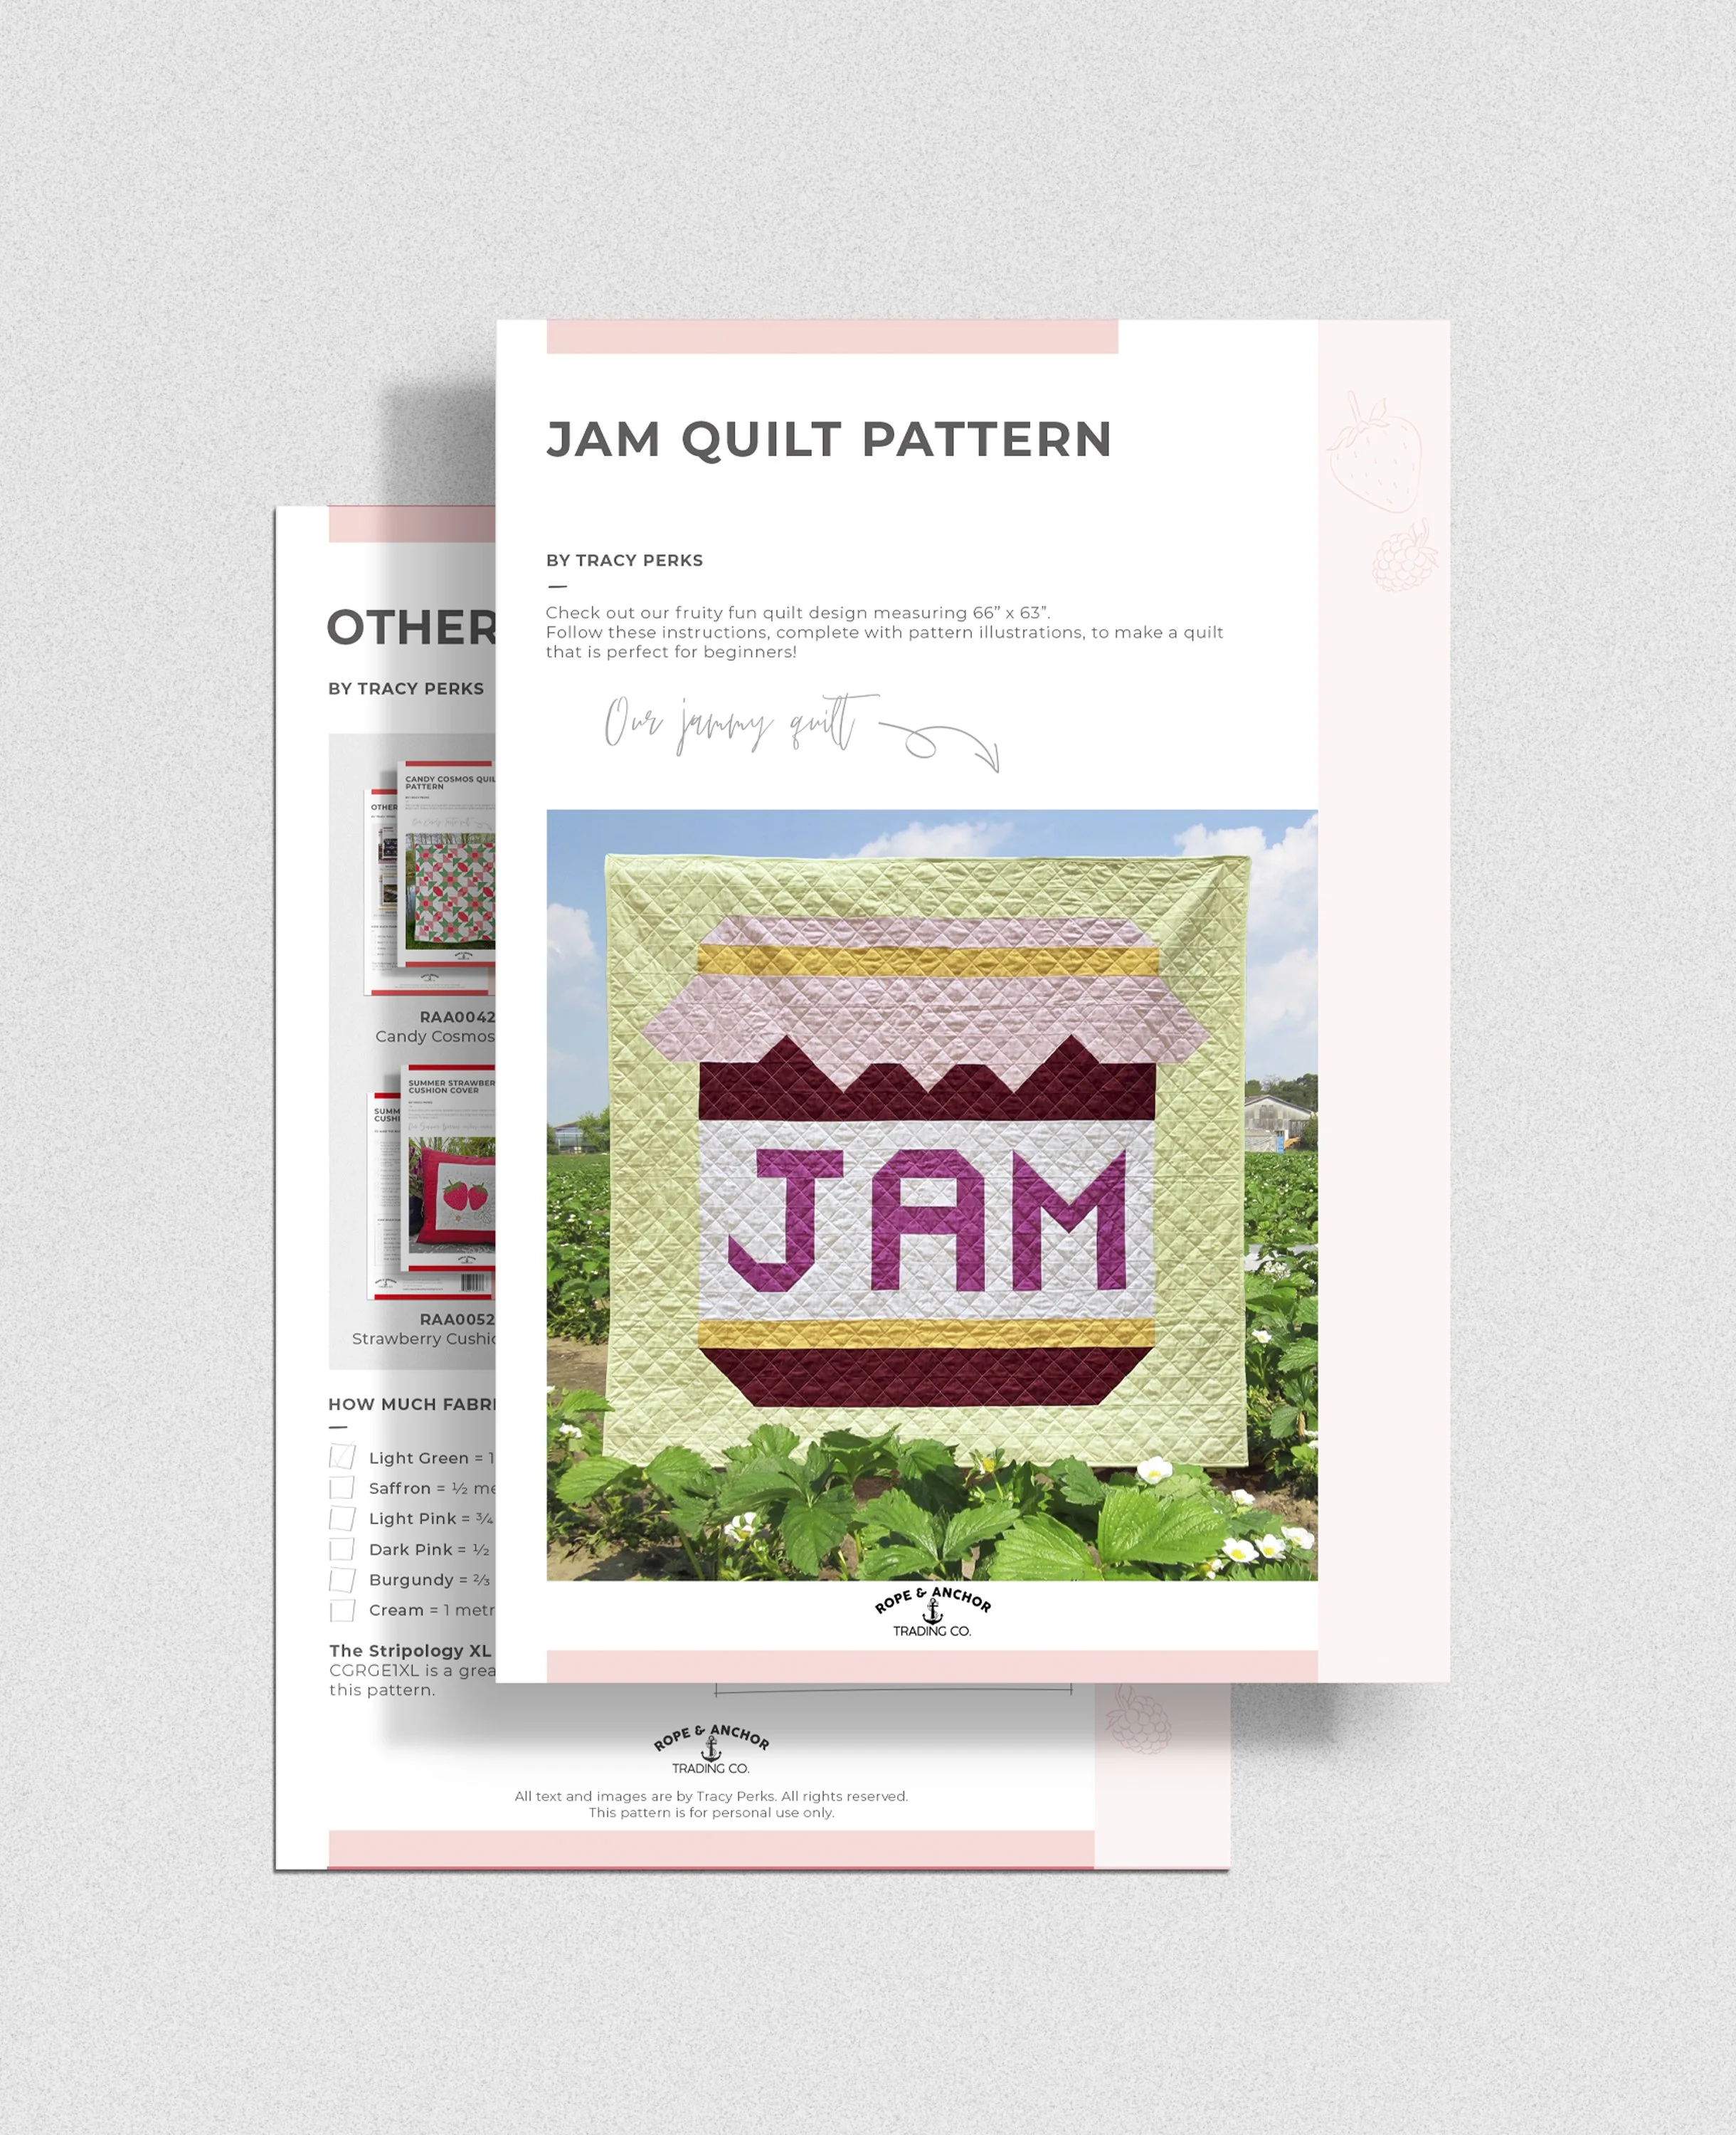
The Jam Quilt Pattern, available as a pdf download for just £10.00.
What You’ll Need
Sewing machine
Rotary cutter, mat, and ruler
Thread
Pins or clips
Iron and ironing board
The Jam Quilt pattern
Nothing fancy - just the basics.
Join In
To share your progress and connect with fellow quilters, we invite you to join the Made on The Cut Facebook Group, where you can post your photos, ask questions, and enjoy community support throughout the Quilt Along.
Made on the Cut, quilting and sewing group | Facebook
A juicy little quilt‑along to sweeten your spring